Night Sky Photography: Essential Equipment Checklist
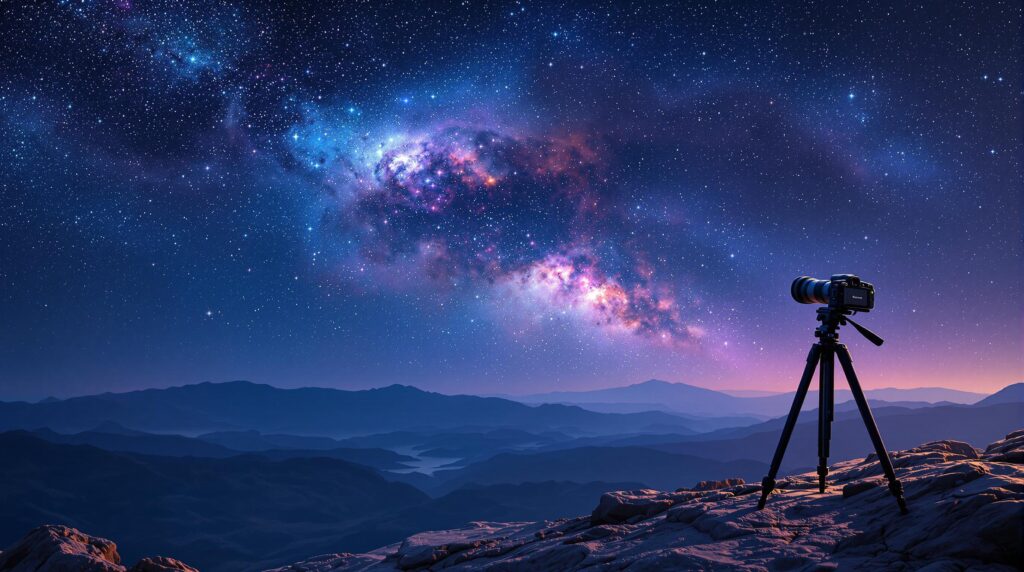
Want to photograph the stars? Here’s what you need to get started:
- Camera: Use a DSLR (like Canon 7D Mk II), mirrorless (Sony A7S III), or a dedicated astronomy camera (ZWO ASI2600MC Pro).
- Lens: Go for wide apertures (f/2.8 or wider) with lenses like the Rokinon 14mm f/2.8 or Sigma 24mm f/1.4.
- Tripod: A sturdy tripod (e.g., Manfrotto MT055CXPRO3) ensures stability for long exposures.
- Tracking Mount: Beginner-friendly options like Sky-Watcher Star Adventurer 2i help track celestial objects.
- Filters: Use light pollution filters, such as the Optolong L-eXtreme, for clearer images in urban areas.
- Software: Tools like DeepSkyStacker or PixInsight refine your photos through stacking and calibration.
Quick Tip: Start simple with your existing camera and a basic star tracker. Upgrade as your skills grow!
| Equipment Type | Example Model | Best For |
|---|---|---|
| Camera | Sony A7S III | Low-light shots |
| Lens | Rokinon 14mm f/2.8 | Wide panoramas |
| Mount | Sky-Watcher Star Adventurer 2i | Beginner tracking |
| Filter | Optolong L-eXtreme | Urban environments |
This guide covers cameras, lenses, mounts, and more to help you capture stunning night sky photos. Let’s dive in!
Top Ten Deep Sky Astrophotography Gear List For Beginners
Basic Equipment List
To achieve the best results when photographing celestial targets, having the right gear is crucial. Here’s a breakdown of the essential equipment.
Camera Types and Features
When it comes to cameras, there are three main options to consider:
- DSLRs: Affordable and versatile, making them ideal for beginners. A good example is the Canon 7D Mk II.
- Mirrorless cameras: Known for excellent low-light performance and compact design. The Sony A7S III is a standout option, with ISO ranges up to 51,200 .
- Dedicated astronomy cameras: Designed specifically for astrophotography. Models like the ZWO ASI2600MC Pro feature cooled sensors and work well with specialized filters, such as those used in the Canon EOS Ra for nebula imaging .
| Camera Type | Benefits | Example Model | Best For |
|---|---|---|---|
| DSLR | Affordable and versatile | Canon 7D Mk II | Beginners |
| Mirrorless | Excellent low-light performance | Sony A7S III | Enthusiasts |
| Astronomy | Cooled sensors, advanced filters | ZWO ASI2600MC Pro | Advanced users |
Lens Requirements
Lenses with wide apertures (f/2.8 or wider) are key for capturing sharp and clear stars. Here are some top recommendations:
- Rokinon 14mm f/2.8: Perfect for wide Milky Way panoramas .
- Rokinon 135mm f/2: Strikes a great balance between light collection and focal length, making it ideal for deep-sky objects .
- Sigma 24mm f/1.4: Offers sharper stars at the corners compared to zoom lenses with variable apertures .
These lenses align with the wide-aperture needs discussed earlier, ensuring optimal results for astrophotography.
Tripod Specifications
A solid tripod is essential for stable shots. Look for models that can handle at least 15 lbs, such as the Manfrotto MT055CXPRO3 . Carbon fiber tripods are particularly effective at reducing vibrations and work well on uneven terrain . Stability is key, so investing in a durable tripod is a must for static astrophotography setups.
Tracking and Control Equipment
Once you’ve got a sturdy tripod in place, adding a tracking system is the next step for capturing sharp, long-exposure shots.
Star Trackers and Mount Types
Choosing between equatorial mounts and portable star trackers depends on your gear and goals. For beginners, the Sky-Watcher Star Adventurer 2i (priced at $399) is a solid option. It’s compact, supports up to 11 lbs of equipment, and offers a 4.5-hour battery life . If you’re working with a more advanced setup, the Sky-Watcher HEQ-5 Pro equatorial mount delivers precise tracking and avoids the field rotation issues seen with simpler mounts .
| Model | Key Feature |
|---|---|
| Sky-Watcher Star Adventurer 2i | Compact and budget-friendly |
| Sky-Watcher HEQ-5 Pro | High-precision tracking |
Adding a basic autoguiding system – like a 50mm guide scope paired with a guide camera – can reduce tracking errors by 60-80%. This allows for exposures up to 5 minutes, which pairs well with low-light cameras such as the Sony A7S III .
Remote Controls and Timers
Using an intervalometer is a simple way to eliminate camera shake during exposures. For more advanced automation, systems like the ASIAir Plus can handle sequences seamlessly, though they require a dependable power source . If you prefer a hardware solution, the Canon TC-80N3 intervalometer is a reliable choice for extended exposure control without worrying about connectivity issues .
"The PoleMaster camera system, combined with SharpCap’s plate-solving alignment, can achieve polar alignment accuracy better than 0.5 degrees – a significant improvement over traditional compass-based methods that often result in errors exceeding 3 degrees" .
Modern alignment tools like the PoleMaster make it easier for newcomers to achieve precise setups, staying true to the article’s focus on accessible gear.
Three common alignment mistakes to watch out for:
- Setting the wrong latitude
- Relying on rushed smartphone alignment
- Skipping mount calibration steps
sbb-itb-9161f90
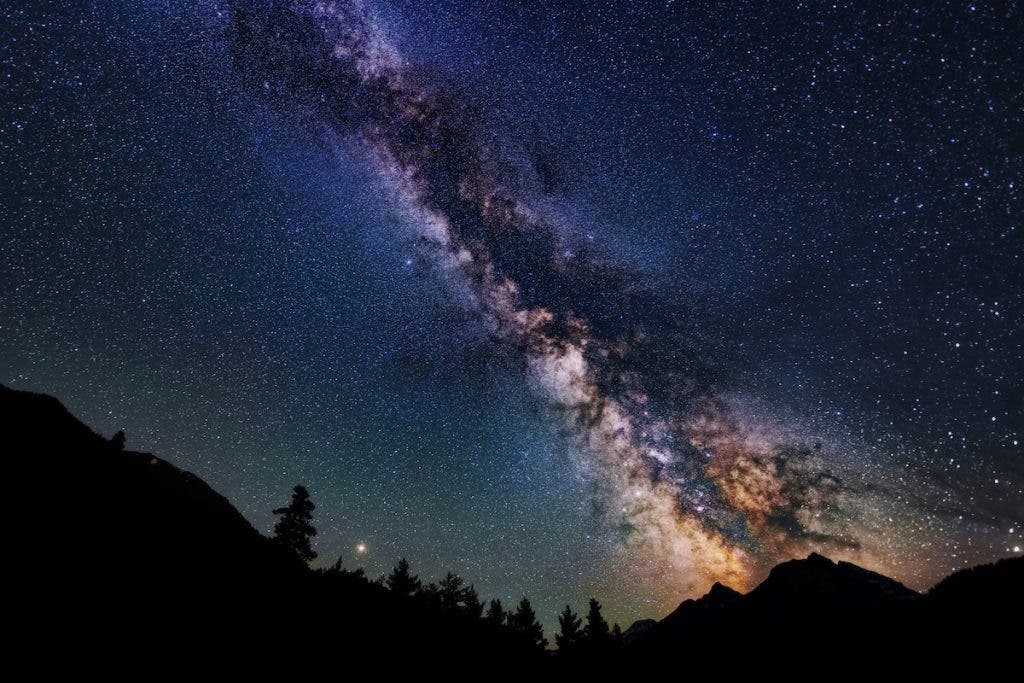
Image Quality Tools
Astrophotography comes with its own set of challenges, but these tools can help you tackle them effectively.
Light Pollution Filters
For astrophotographers in urban and suburban areas, light pollution filters are a game-changer.
The Optolong L-eXtreme dual narrowband filter works wonders in city environments, enhancing image clarity significantly . Meanwhile, rural photographers might prefer the Hoya Starscape broadband filter, which maintains a more natural color balance without cutting off too many wavelengths .
| Location Type | Recommended Filter | Key Benefit |
|---|---|---|
| Urban (Bortle 8-9) | Optolong L-eXtreme | Isolates Ha/OIII emissions |
| Suburban (Bortle 6-7) | Astronomik CLS | Balanced light reduction |
| Rural (Bortle 4-5) | Hoya Starscape | Preserves natural colors |
When choosing a filter, consider your exposure method. For guided long exposures, narrow 3nm filters are ideal. On the other hand, 15nm filters are better suited for shorter, unguided shots .
Dew Control Equipment
Dew buildup can ruin a shoot, but the DewBuster X4 controller ensures precise temperature regulation with a stability of ±0.5°C, making it perfect for long sessions .
Choose the right heater for your setup:
| Setup Size | Recommended Solution |
|---|---|
| Small Lenses | Dew Not Micro 4 |
| Medium Refractors | Kendrick 2" Primary |
| Large Telescopes | DewBuster Dual-Channel |
"DewBuster X4 maintains ±0.5°C stability critical for lunar imaging, outperforming budget controllers with 2°C+ variations" .
To keep your gear in top condition, schedule regular maintenance, including cleaning and checking electrical components . For optimal results, position heater bands at the mid-point of the barrel to ensure even heat distribution .
Software and Processing Tools
To turn your night sky photos into stunning celestial images, you’ll need specialized software. These tools refine the raw data captured by your equipment, helping you achieve professional-quality results.
Image Stacking Programs
Image stacking is a key technique that combines multiple exposures to improve photo clarity and detail. Several programs can handle this task effectively:
| Software | Best For | Price |
|---|---|---|
| PixInsight | Professional editing and batch processing | $230 |
| DeepSkyStacker | Free stacking for Windows users | Free |
| Sequator | Star trail processing | Free |
| Siril | Open-source calibration processes | Free |
PixInsight is a go-to choice for advanced users, while DeepSkyStacker offers a free, user-friendly option. For those focusing on star trails, Sequator is a great pick. Meanwhile, Siril provides a versatile open-source solution for calibration needs.
"Stacking 25x 2-minute exposures creates an effective 50-minute integration time" .
A newer tool shaking up the workflow is Topaz DeNoise AI, which uses artificial intelligence to cut required integration time by 40% through advanced noise reduction .
Calibration Methods
Calibration is essential for removing imperfections like noise and vignetting from your images. By following precise calibration techniques, you can significantly enhance the quality of your final results.
Here are the key calibration frames you’ll need:
- Dark frames: Match exposure and temperature to your light frames.
- Flat frames: Aim for 50-75% histogram saturation.
- Bias frames: Capture at least 100 frames for accuracy.
For dark frame calibration, it’s recommended to capture 15-20 frames under identical exposure and temperature settings . Tools like ASTAP and N.I.N.A. are excellent for managing this process and ensuring your camera’s metadata stays intact.
If you’re looking to streamline your workflow, automation tools like WBPP in PixInsight can save time, reducing manual steps by 70% compared to traditional methods . And for those working with narrowband filters, PixInsight’s photometric color calibration is a must-have for achieving precise colors .
Conclusion
Building a solid astrophotography kit means starting with the basics and upgrading thoughtfully over time. The key is to meet your current needs while leaving room for future growth.
Start with a camera that performs well in low light and pair it with a reliable, accurate mount. As your skills improve, you can add lenses and filters to expand your capabilities. Many photographers find themselves upgrading their mounts within two years, which underscores the importance of selecting equipment that aligns with your evolving expertise.
Your choice of optics plays a big role in the quality of your images. Wide-angle lenses with fast apertures (like f/2.8 or wider) allow you to capture more light in shorter exposures . For those shooting in urban environments, filters designed to combat light pollution can make a noticeable difference in image clarity .
Focus on the essentials first: a light-sensitive camera, a precise mount, and a fast lens. These are the core components that form the backbone of your kit. Also, think about your typical shooting locations when deciding on additional gear. Taking good care of your equipment ensures it lasts longer, allowing your setup to evolve alongside your skills.
FAQs
What accessories do you need for astrophotography?
To tackle common challenges in the field, a few key accessories can make all the difference:
- Red headlamp: Helps preserve your night vision. The Celestron Essentials headlamp, priced between $15-$30, is a reliable choice .
- Bahtinov mask: Ensures precise focusing. These typically cost $25-$50 and are a must-have for sharp images .
- DIY dew heaters: Prevents condensation on lenses. Reptile heating cables, available for around $35, work well for this purpose .
- Portable power station: Keeps your equipment running during long sessions. The Jackery Explorer 1000, priced at $999, can power an 8-hour shoot with ease .
These accessories are designed to enhance the core setup of a camera, mount, and tripod, as covered in the Basic Equipment section.
What mount do you need for astrophotography?
Accurate tracking is crucial for astrophotography, especially when capturing deep-sky objects that require long exposures.
Equatorial mounts are the go-to choice for their ability to handle multi-minute exposures. If you’re just starting out and need something more budget-friendly, the Fornax LightTrack II, priced at $799, is a solid option that balances affordability with professional-level performance .
This recommendation ties back to the tracking precision discussed in the Image Quality Tools section.