Checklist for Preparing Your Stargazing Site
Stargazing is all about preparation. Here’s how to make your night under the stars smooth and enjoyable:
- Pick the Right Spot: Choose a dark-sky location with minimal light pollution (Bortle scale 1-3), safe access, and stable ground.
- Check Weather: Ensure clear skies, low humidity, calm winds, and stable temperatures.
- Bring Essential Gear: Telescope, camera, power supply, seating, warm clothing, and snacks.
- Plan Your Night: Use star maps or apps to identify visible celestial objects and plan your observations.
- Protect Night Vision: Use red lights and let your eyes adjust to the dark for 20 minutes.
Preparation saves time, protects your equipment, and enhances your experience. Follow this checklist to enjoy the beauty of the cosmos!
HOW TO PREPARE FOR TRAVELLING to a DARK SKY SITE
Finding Your Stargazing Location
Choosing the right spot is key for a successful night of stargazing. The factors below will help you plan a safe and enjoyable experience under the stars.
Dark Sky Spots
To avoid light pollution and get the best views, use these tools and tips:
- Light Pollution Maps: Apps with color-coded maps can help you identify areas with minimal light interference.
- Bortle Scale: Look for locations rated between 1 and 3 for the clearest skies.
- Elevation: Higher altitudes often provide better visibility by reducing the impact of city lights.
Site Safety and Access
A good stargazing spot isn’t just about dark skies – it also needs to be safe and accessible.
- Road Access: Check the condition of roads leading to your site, confirm vehicle clearance, and note gate closure times for parks or public areas. Also, verify cell service in case of emergencies.
- Ground Conditions: Ensure you have a stable, level surface for setting up equipment. Avoid areas prone to flooding or wet spots, and look for natural windbreaks to protect your gear.
- Security: Research local regulations and secure any necessary permits. Choose a location with clearly visible parking and proximity to emergency services. Be aware of wildlife activity in the area.
Weather Check
Weather plays a huge role in stargazing. Keep an eye on these factors:
- Cloud Cover: Clear skies are ideal, so aim for nights with minimal cloud cover.
- Humidity: Lower humidity levels improve visibility and help prevent condensation on your equipment.
- Wind: Calm conditions are better for keeping your gear stable.
- Temperature: Consistent temperatures reduce the risk of equipment issues caused by rapid changes.
Use astronomy-specific forecasts 24–48 hours in advance, check satellite images for cloud movement, and review local temperature trends to plan accordingly.
Required Equipment List
Here’s what you need to get the most out of your stargazing experience:
Telescope Setup
- Primary Telescope: Choose one that fits your goals and is easy to transport.
- Mount System: Go for a stable mount – equatorial for tracking or alt-azimuth for simplicity.
- Finder Scope: Helps locate objects in the sky more easily.
- Eyepiece Set: Have three eyepieces for different magnifications:
- Low power (25-32mm)
- Medium power (12-18mm)
- High power (6-9mm)
- Collimation Tools: Keep your telescope’s optics properly aligned.
Photo Equipment
- Primary Camera: Use a DSLR or a specialized astronomy camera.
- T-Ring Adapter: Connects your camera to the telescope.
- Remote Shutter: Minimizes vibrations during long exposures.
- Memory Cards: Bring several high-capacity cards.
- Dew Shield: Protects optics from condensation.
- Red Flashlight: Lets you check your gear without ruining your night vision.
Power Supply
| Power Item | Capacity Needs | Recommended Usage |
|---|---|---|
| Main Power Station | 500W+ | Telescope & mount |
| Backup Battery | 200W+ | Camera equipment |
| Extension Cables (25 ft+) | – | Equipment layout |
| Power Strip (6 outlets) | – | Powering multiple devices |
Comfort Items
- Seating: Use an adjustable astronomy chair or a sturdy camping chair.
- Weather Protection:
- Insulated jacket for nighttime temperatures
- Warm hat and gloves
- Waterproof ground cover (at least 10×10 ft)
- Refreshments:
- Thermos for hot drinks
- Water bottles
- High-energy snacks
- Safety Items:
- First aid kit
- Emergency contact list
- Site location coordinates
- Backup phone battery
sbb-itb-9161f90
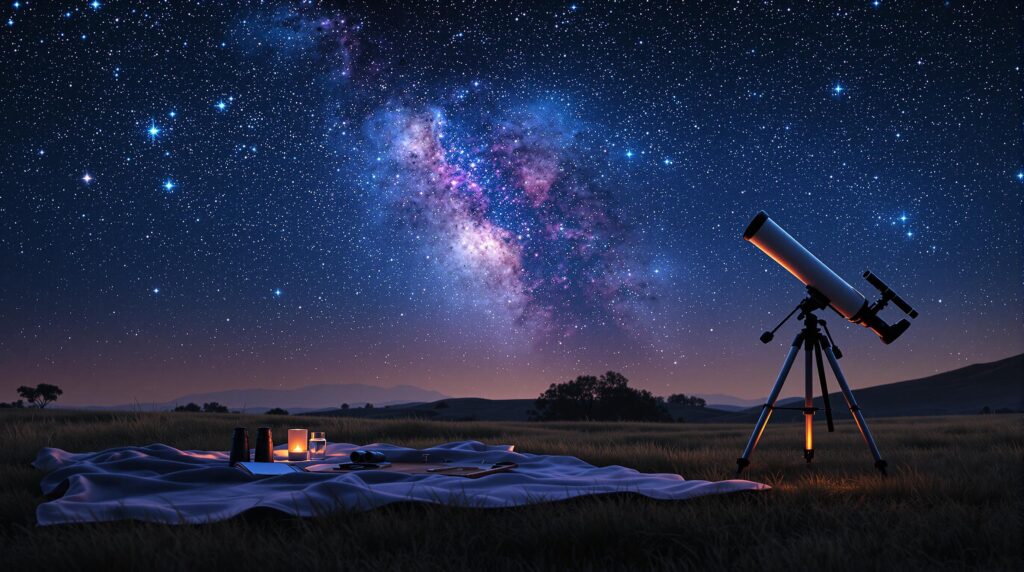
Site Setup Steps
Equipment Layout
Set up your gear in a way that keeps everything within easy reach and ensures smooth operation. Start by placing your telescope mount on a stable, level surface. Arrange your equipment around it so you can access everything quickly. Position your power station where it avoids cable strain and keeps the area tidy.
Cable Management
Keep your cables neat and safe by securing them along clear paths using tape or cable organizers. Separate power cables from electronic ones, and make sure they run straight and securely to avoid interference or becoming a tripping hazard.
Observation Area Layout
Plan your observation space for both comfort and practicality, especially if you’re planning a long session. Arrange a primary viewing area around your telescope. Nearby, set up spaces for staging equipment, taking short breaks, and safely storing extra gear. Keep essential tools like star charts close at hand for quick reference.
Before You Start
Sky Maps and Planning
Use reliable tools like Stellarium or printed star charts to plan your viewing session. Be sure to include:
- Moonrise and moonset times
- When specific objects will be visible
- Best viewing angles
- Weather and cloud forecasts
Once you’ve mapped out your targets, set up your environment to ensure the best possible viewing conditions.
Night Vision Setup
Give your eyes about 20 minutes to adjust to darkness. To protect your night vision, stick to red lighting. Use red flashlights, cover LED screens with red filters, switch your phone to red mode, and keep a separate bright-light area far from your observation spot.
Once your eyes are adjusted, make sure your setup is comfortable for a long session.
Personal Comfort
Prepare for long hours outside by bringing these essentials:
- Insulated seating
- A thermos with a hot drink
- High-energy snacks
- Hand warmers
- Moisture-wicking base layers
- Warm, fingerless gloves
Dress in layers to stay comfortable, as nighttime temperatures can drop quickly.
Packing Up
Once your session wraps up, make sure to pack everything properly to keep your gear safe and leave the site in good condition.
Equipment Storage
Follow the manufacturer’s instructions when storing your telescope and camera gear. This helps prevent any potential damage and keeps your equipment in top shape for future use.
Site Inspection
Before heading out, double-check the area to ensure you’ve collected all your gear. Don’t forget to clean up any trash to leave the site as you found it.
Wrapping Up
By following the steps and tips outlined above, you can make stargazing enjoyable and hassle-free. A well-prepared site not only saves time but also minimizes frustrations, letting you fully enjoy the beauty of the night sky.
Essential preparation tips include:
- Choosing a location with minimal light pollution
- Checking weather forecasts before heading out
- Organizing your gear to avoid messy cables
- Preserving your night vision with red lights or filters
- Packing comfortable clothing and gear for the conditions
For more detailed advice, check out Sat ND Telescope and Astrophotography. They offer in-depth guides on choosing telescopes, mastering astrophotography, and using celestial observation tools. Their resources are helpful for both beginners and seasoned stargazers.
Every part of the preparation process – finding the right spot, managing your equipment, and planning ahead – helps create a rewarding stargazing experience. Whether it’s your first time or you’re a seasoned pro, having a structured plan ensures you get the most out of your night under the stars. Keep this guide handy and adjust it as you gain experience.