Easy Steps to Master Your First Telescope

While you might think mastering your first telescope is challenging, it’s really a matter of following straightforward steps that guarantee a rewarding stargazing experience.
You’ll start by selecting the right location, which sets a solid foundation for everything that follows. From assembling your telescope correctly to aligning the finder scope and adopting basic viewing techniques, each step is designed to enhance your journey through the cosmos.
As you become familiar with sky navigation and the maintenance of your equipment, you’ll discover the importance of accessories and safety precautions.
However, even the most meticulously maintained telescope can encounter issues, leaving you to troubleshoot common problems and make sure your stargazing sessions remain uninterrupted.
Let’s explore how these elements come together to transform you into a proficient observer of the night sky, with insights and tips that promise to elevate your astronomical adventures.
Key Takeaways
- Proper setup and maintenance ensures a clear and stable viewing experience.
- Utilizing the right accessories and techniques enhances magnification and viewing quality.
- Navigating the sky with maps or apps and aligning the finder scope are crucial for accurate observation.
- Regular troubleshooting and safety precautions protect both the user and the telescope.
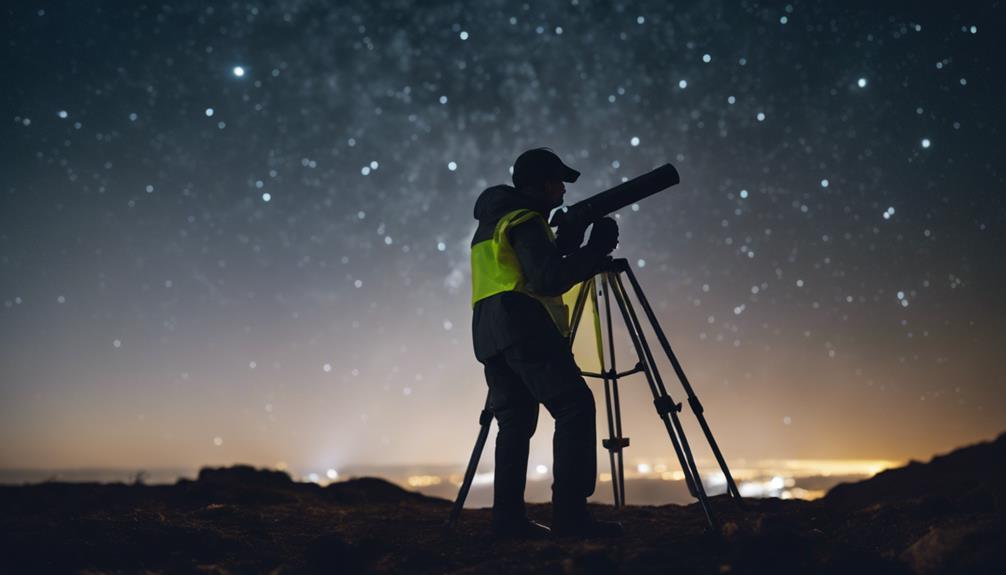
Selecting the Right Location
Choosing the right location is important for maximizing your telescope’s performance, as it directly impacts stability, light interference, and the quality of your celestial observations.
When selecting a location, prioritize choosing a stable surface. This means finding a flat, even area that can support your telescope without any wobbling during observation. Although you might think hard surfaces like concrete are ideal, they can actually amplify vibrations, detracting from the viewing quality. Instead, seek out softer ground that can absorb these vibrations more effectively.
Shielding your telescope from local light sources is also critical. Use a dew shield or a simple towel to block unwanted light interference that can diminish the clarity of celestial bodies. This step is especially important in densely populated areas where artificial lighting is prevalent.
Minimizing light pollution is another key consideration. Select a location with minimal light pollution to ensure ideal stargazing conditions.
This often means venturing away from urban centers to areas where the night sky is clearer and celestial objects are more vivid. Remember, the goal is to find a balance between a stable viewing platform and an environment free from light pollution and direct interference.
Assembling Your Telescope
After selecting the right location for your stargazing endeavors, the next step involves assembling your telescope, a process that requires attention to detail to make sure each component is correctly aligned and secured.
Assembling a telescope typically entails attaching the optical tube to the mount and securing any accessories, like finderscopes or eyepieces. It’s paramount to follow the manufacturer’s instructions carefully to guarantee proper assembly and alignment of all components for best performance.
| Emotion | Why It’s Important |
|---|---|
| Excitement | Feeling the anticipation of exploring the cosmos. |
| Patience | Taking your time guarantees accuracy in assembly. |
| Satisfaction | Achieving a correctly assembled and aligned telescope. |
| Confidence | Knowing your equipment is ready for the skies. |
Check for any loose screws or parts during assembly to prevent issues while observing celestial objects.
Familiarize yourself with the different parts of the telescope to streamline the process and avoid confusion. Remember, taking your time during assembly avoids mistakes that could affect the telescope’s functionality or alignment, setting you up for a successful stargazing experience.
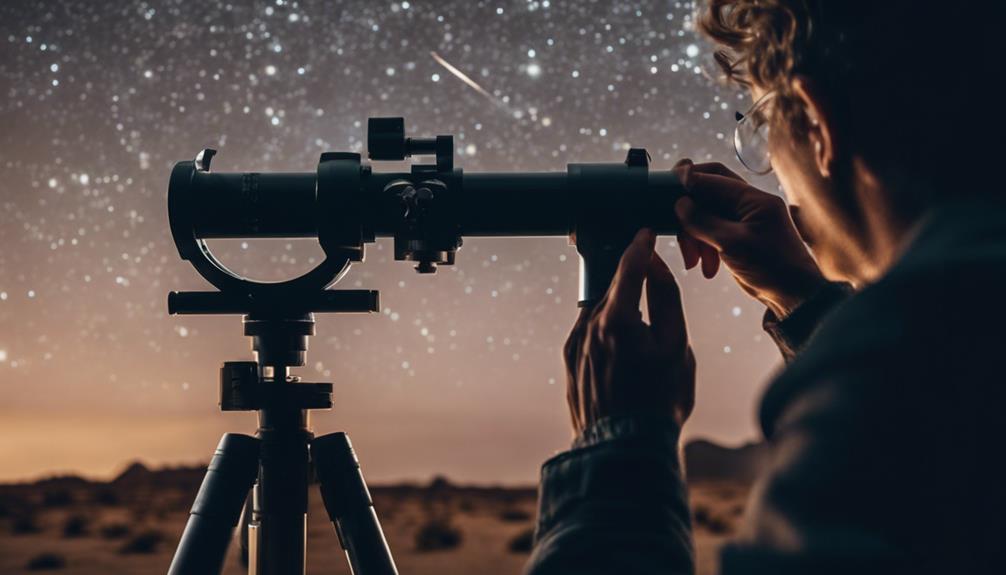
Aligning the Finder Scope

To confirm your telescope’s finder scope is accurately aligned, start by identifying a distinct, stationary reference point. This could be a distant terrestrial object or a bright, easily identifiable celestial body.
Next, you’ll need to adjust the finder scope for precision by carefully manipulating its alignment screws or knobs. Aim for a perfect overlay of the target in both the finder’s view and through the main telescope eyepiece.
Finding a Reference Point
Before you begin a journey through the cosmos with your telescope, guarantee the finder scope with a well-defined, stationary target during daylight hours to ensure precise tracking of celestial objects.
Aligning the finder scope is a crucial step in accurately locating objects in the night sky. Choose a target that’s easy to distinguish and doesn’t move. Utilize the alignment screws or knobs on the finder scope bracket for adjustments.
Ensure the chosen object is centered in the crosshairs of the finder scope to verify alignment. If the alignment drifts, re-adjust using the alignment screws to maintain accurate object location.
| Step | Action | Emotion |
|---|---|---|
| 1 | Choose a well-defined target | Anticipation |
| 2 | Adjust alignment screws | Focus |
| 3 | Center target in crosshairs | Satisfaction |
| 4 | Verify alignment | Confidence |
| 5 | Re-align if necessary | Persistence |
Adjusting for Precision
Guarantee that you accurately align your finder scope, a critical step in achieving precision in celestial navigation and observation. Proper finder scope alignment is paramount for efficient target acquisition.
Whether you’re using an optical finder scope for its wide-angle, low power ease in locating objects, or a red dot finder scope that projects an LED dot to center objects in your field of view, precision starts here.
Before each observing session, take the time to make sure your finder scope is perfectly aligned. This not only enhances your viewing experience but also guarantees that your efforts to locate celestial objects aren’t in vain.
Regular alignment checks prevent frustration and improve the accuracy of your observations, making every session more rewarding.
Night Sky Alignment
After ensuring your finder scope is precisely aligned, the next step involves mastering night sky alignment to optimize your telescope’s observational capabilities. Make sure to familiarize yourself with optical and red dot finder scopes.
Optical finders offer a wide-angle, low-power view that’s essential for locating celestial objects, while red dot finders simplify the process by projecting a LED dot to help center objects.
It’s important to regularly check the alignment of your finder scope for accurate object location. Before each observing session, align the finder scope to ensure precision. When an object is centered in the finder’s scope, verify that it’s also centered in the telescope’s eyepiece.
This dual alignment is key to enhancing your stargazing experience and achieving accurate observations.
Basic Viewing Techniques
To master basic viewing techniques with your telescope, it’s important to start by choosing the correct eyepiece, as this choice greatly influences both the breadth and detail of celestial objects you’ll observe.
Selecting the right eyepiece and adjusting magnification are foundational steps in enhancing your astronomical observations. Here are key strategies to improve your viewing experience:
Eyepiece Selection and Magnification Adjustment:
- Use low power eyepieces for wide-angle views, ideal for scanning the night sky and finding objects of interest. These eyepieces provide a larger field of view, making it easier to locate celestial phenomena.
- Switch to high power eyepieces for detailed observation of planets, moons, and distant stars. High magnification offers a closer look but narrows the field of view, so precise alignment and focusing become critical.
Focusing Tips for Clarity:
- Practice focusing on objects at varying distances to get a feel for your telescope’s focus mechanism. This skill is essential for achieving sharp, clear images, especially when observing objects with subtle details.
Observation Techniques for Depth and Clarity:
- Keep both eyes open while viewing to reduce eye strain and enhance depth perception, a technique that can enhance your observational experience.
Navigating the Night Sky
To effectively navigate the night sky, you’ll need to master the use of star maps and identify constellations with precision.
Analyzing star charts or utilizing a planetarium app enables you to pinpoint celestial objects accurately, enhancing your stargazing experience.
Star Maps Usage
Exploring through the vast expanse of the night sky, star maps serve as your indispensable guide, detailing the positions of celestial objects with precision. Understanding constellations, utilizing digital star maps, and following stargazing tips are key to mastering their use.
Here’s how:
- Understanding Constellations: Learn the major constellations as they act as markers to navigate and locate other celestial bodies.
- Digital Star Maps: Embrace technology by using digital apps. They provide real-time updates and interactive features, enhancing your ability to track celestial movements accurately.
- Stargazing Tips: Plan your observation sessions around minimal light pollution and clear skies. Familiarize yourself with star map symbols and scales to interpret the sky above more effectively.
Constellation Identification Tips
Having mastered the use of star maps, it’s now time you focus on honing your skills in constellation identification to navigate the night sky with greater accuracy. Start by looking for familiar patterns of stars, using a star chart or an astronomy app for guidance.
Pay close attention to the position and relative brightness of stars to distinguish between constellations effectively. Practice by identifying major constellations like Orion, Ursa Major, and Cassiopeia. This method not only sharpens your stargazing techniques but also enhances your sky navigation abilities.
Additionally, joining a local astronomy club can offer you deeper insights into star chart tips and further refine your constellation identification skills, maximizing the benefits of collaborative learning and shared stargazing experiences.
Maintaining Your Telescope

Maintaining your telescope requires a meticulous approach to cleaning, storage, and regular adjustments to guarantee its peak performance and longevity. Understanding the nuances of this process is important to enhancing your astronomical observations.
Here are three essential aspects to take into account:
Cleaning Techniques:
Regularly clean the lenses and mirrors using a soft brush or compressed air to remove dust and debris. This step is essential; even a thin layer of dust can greatly degrade the quality of your observations. Avoid using regular cleaning fluids or rough materials that could scratch the surface.
Storage Solutions:
Always store your telescope in a dry, dust-free environment. Moisture is your telescope’s enemy, leading to mold growth and optical damage over time. Utilize silica gel packets within your storage area to absorb any excess moisture. Keeping your telescope covered when not in use will also protect it from environmental elements.
Collimation Tips:
Proper collimation, or the alignment of the telescope’s optics, is key to achieving sharp and clear images. Regularly check and adjust the collimation, especially after transporting your telescope. This might seem challenging at first, but with practice, it becomes a straightforward task that greatly enhances your viewing experience.
Following these guidelines will make sure your telescope remains in top condition, ready for countless nights of exploring the cosmos.
Enhancing Your Experience With Accessories
After ensuring your telescope’s maintenance, it’s time to enhance your astronomical journey by selecting the right accessories.
Diving into the domain of accessory options, consider starting with Barlow lenses, which can greatly increase the magnification of your telescope. By doubling or even tripling the magnification, you’ll reveal detailed views of celestial objects that were previously beyond your grasp.
Enhancement tips often highlight the importance of filters. For instance, moon filters can reduce the intense glare of the moon, while light pollution filters work to enhance contrast in urban skies plagued by artificial lighting. These filters are vital for extracting more detail from your observations.
Stability is key for clear images, making a sturdy tripod or mount an excellent upgrade suggestion. They minimize vibrations, ensuring your celestial observations are as sharp as possible. Additionally, collimation tools are essential for maintaining the alignment of your telescope’s mirrors and optimizing the clarity and quality of your night sky views.
Observing Safety Precautions
To confirm a safe and rewarding astronomical observation experience, it’s crucial to follow specific safety precautions. Observing the cosmos can be an enriching activity, but neglecting safety measures can lead to unfortunate incidents, affecting both you and your equipment. Here are key precautions to ensure a secure stargazing session:
Eye Protection and Equipment Safety
- Always use solar filters when observing the sun to prevent severe eye damage. This measure is crucial; direct observation without protection can lead to permanent vision loss. Secure your telescope firmly to its mount to avoid accidental tipping, which could damage the equipment or cause injury.
Wildlife Awareness and Terrain Hazards
- Being mindful of your surroundings is crucial, especially in unfamiliar outdoor settings. Check for wildlife and be aware of terrain hazards like uneven ground or hidden obstacles to prevent trips and falls. These precautions protect both you and your equipment.
Child Supervision and Light Etiquette
- Keep small children supervised around the telescope to prevent accidents. Use red flashlights or low-intensity lights to preserve your night vision and minimize the disruption to others nearby. Practicing good light etiquette enhances the experience for everyone involved.
Troubleshooting Common Issues
Even the most meticulously assembled telescopes can encounter operational issues, necessitating a systematic approach to troubleshooting for best performance. When you’re faced with challenges, it’s vital to dissect the problem with a technical, analytical mindset.
Here’s a detailed guide to help you identify and solve common issues:
| Issue | Solution |
|---|---|
| Misaligned Components | Conduct a thorough component inspection to guarantee everything is correctly positioned and securely fastened. |
| Finder Scope Misalignment | Re-align the finder scope with the main telescope to guarantee precise navigation. Follow the alignment instructions meticulously. |
| Dirty Lenses or Mirrors | Perform regular lens cleaning using appropriate tools and techniques to avoid image distortion. Refer to cleaning guidelines for the best results. |
| Unfocused Images | Adjust the focus mechanism gradually to sharpen and clarify the observed images. Patience and slight adjustments are key. |
| Unresolved Troubleshooting | Consult the telescope’s user manual for specific guidance, or contact customer support for expert advice. |
Addressing these common problems involves a mix of careful observation, mechanical adjustment, and regular maintenance. By following the outlined solutions, you can ensure your telescope remains in top-notch condition for exploring the wonders of the night sky.
Frequently Asked Questions
What Are the First Steps With a Telescope?
You’ll start by choosing dark, stable stargazing locations to reduce light pollution. Then, assemble your telescope, aligning the finder scope for precision. Master basic viewing techniques and navigate the night sky for celestial events and night photography.
What Is the Correct Technique to View Through a Telescope?
To view through a telescope correctly, you’ll need proper eye positioning, minimizing light pollution, and selecting the right magnification. Begin with low magnification for easier object location, adjusting your focus for the clearest image.
How Do You Set up a Telescope for Beginners?
To set up your telescope, find a location with minimal light pollution and check the weather conditions. Use star maps for sky navigation. Assemble it as directed, ensuring the finder scope’s aligned for accurate viewing.
What Should I Look at First With My Telescope?
Ironically, you’d think the vast universe lacks visible details, but your first telescope views should focus on lunar details, planetary observation, and star clusters, diving into the technical marvels of celestial objects’ intricate appearances.
Conclusion
Conclusively, mastering your telescope transforms stargazing into a spectacular spectacle, seamlessly synthesizing skills from selecting sites to solving snags.
Carefully calibrate components, orienting accessories accurately, while exploring nocturnal nuances. Maintain meticulously, mitigating malfunctions. Supplementing with suitable scopes and stellar software sharpens sightings.
Prioritize protective practices to preserve your precious portal. Embrace each element, from foundational fundamentals to advanced adjustments, ensuring an enriched, efficient exploration of the ethereal expanse.
Dive deep, delight in details, and discover the dazzling dimensions of the cosmos.