How to Choose a Portable Power Station for Telescopes
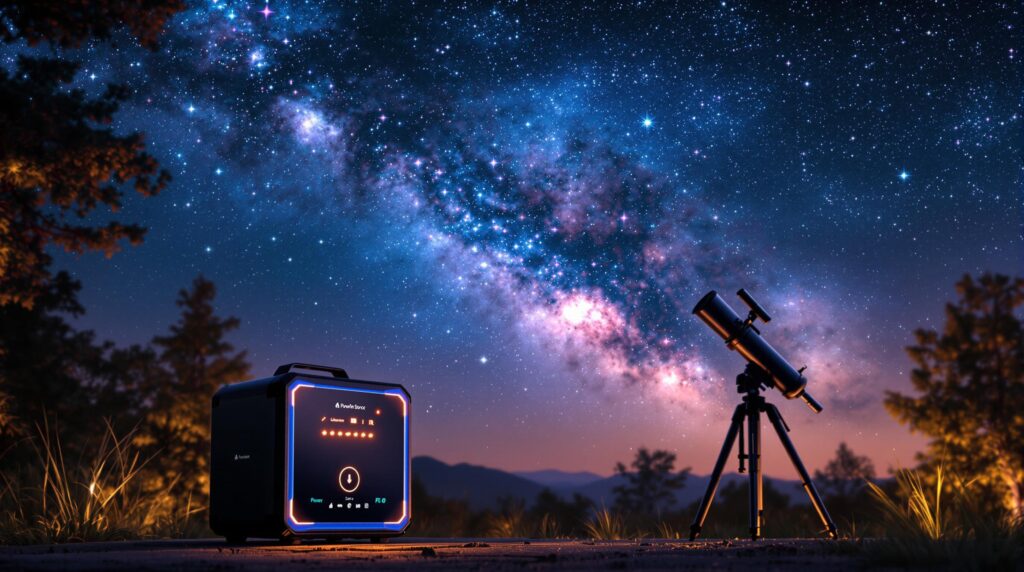
Need to power your telescope in remote areas? Here’s a quick guide to help you pick the right portable power station:
- Calculate Power Needs: Add up the wattage of all your devices (e.g., mounts, cameras, dew heaters). Multiply by the hours you’ll use them to find the required battery capacity in watt-hours (Wh). Example: An 87W setup for 6 hours = 522 Wh minimum.
- Cold Weather Performance: If observing in low temperatures, choose a station with LiFePO4 or high-quality Lithium-Ion batteries.
- Key Features to Look For:
- Output: Pure sine wave, stable 12V DC, and enough wattage for your devices.
- Ports: Ensure it has the right mix (12V DC, USB-A, USB-C, AC outlets).
- Portability: Lightweight (<15 lbs) for remote use; durable build for outdoor conditions.
- Battery Options:
- Lead-Acid: Budget-friendly but struggles in cold and heavy.
- Lithium-Ion: Lightweight, decent in cold, medium lifespan.
- LiFePO4: Best for durability and cold weather, but heavier and pricier.
Quick Comparison
| Model | Capacity | Weight | Price | Best For |
|---|---|---|---|---|
| Jackery Explorer 300 | 293Wh | 7.1 lbs | $299.99 | Short sessions, portability |
| EcoFlow Delta Pro | 3600Wh | 84 lbs | $3,699.99 | Long sessions, pro setups |
Pick a power station based on your setup’s power needs, session duration, and portability requirements. For cold weather, prioritize LiFePO4 batteries. Ready to dive deeper? Keep reading for detailed tips and product recommendations.
Astronomy Power Options
Calculate Your Telescope’s Power Needs
Now that we’ve covered power challenges, let’s dive into how to calculate your telescope’s power requirements. Accurate calculations ensure you pick a power station that fits your needs.
Measure Total Power Usage
Start by reviewing the power specifications for each piece of equipment (usually listed on the device or in its manual). Here’s how to calculate your total power consumption:
- Find power ratings: Look for the wattage (W). If only voltage (V) and amperage (A) are listed, note those instead.
- Convert to watts: Use the formula W = V × A to calculate the wattage.
- Add everything up: Sum the wattage of all your devices to get the total power consumption.
For example, a typical setup might look like this:
| Equipment | Power Consumption |
|---|---|
| GoTo Mount | 48W (12V × 4A) |
| Dew Heater | 24W (12V × 2A) |
| Camera | 10W |
| Guide Camera | 5W |
| Total | 87W |
This total gives you the baseline for estimating your power needs.
Plan Your Power Duration
Next, think about how long you’ll be observing. Multiply your total wattage by the number of hours you plan to use your equipment. This gives you the minimum battery capacity needed, measured in watt-hours (Wh).
For instance, if your 87W setup runs for 6 hours, you’ll need at least 522 Wh. To be safe, choose a power station with a higher capacity to handle any unexpected demands.
Cold Weather and Batteries
Cold weather can impact battery performance, so it’s essential to plan for these conditions. Keep these tips in mind:
- Use a power station that’s built to perform well in low temperatures.
- Be aware that cold weather can reduce battery capacity, so opt for extra capacity when observing in the cold.
- Charging times may also increase in colder conditions, so plan ahead.
With these calculations, you’re ready to evaluate the features and battery types discussed in the next sections.
Must-Have Power Station Features
Once you’ve figured out your power needs, it’s time to look at the features that make a power station a good match for telescope use. Here are the key details to keep in mind for dependable performance during stargazing.
Power Output and Voltage
Your power station needs to meet specific output and voltage requirements to handle sensitive telescope equipment. Here’s what to look for:
- Pure sine wave output: Critical for powering delicate electronics.
- Stable 12V DC regulation: Ensures consistent voltage for your gear.
- Continuous power: Should be at least 20% higher than your calculated power needs.
For instance, if your setup uses 87W, opt for a power station with a continuous output of at least 105W.
Connection Types
Modern telescopes often require multiple connections for accessories. A good power station should include a variety of ports:
| Port Type | Purpose | Recommended Quantity |
|---|---|---|
| 12V DC Ports | Power for mount and telescope | 2–3 ports |
| USB-A Ports | Guide cameras, controllers | 2–4 ports |
| USB-C PD | Modern cameras, tablets | 1–2 ports |
| AC Outlet | Backup power for emergencies | 1 port |
Extra ports are a plus, especially if you plan to add more equipment in the future.
Size and Build Quality
For field use, portability and durability are a must. Keep these factors in mind:
- Weight: Aim for models under 15 pounds (6.8 kg) for easier transport.
- Weather resistance: An IP54 rating or higher is ideal for outdoor use.
- Temperature range: Choose units rated to operate between 14°F and 104°F (–10°C to 40°C).
Durability features to look for:
- Reinforced corners and impact-resistant housing.
- Rubber-sealed port covers to block out dust and moisture.
- Built-in carrying handles for easy transport.
- Non-slip rubber feet to keep the unit stable.
If you’re often hiking to remote stargazing spots, lighter models with lithium-ion or LiFePO4 batteries might be worth considering, even if they have slightly lower capacity.
Next, we’ll dive into battery technologies to help you find the best option for your astronomy setup.
sbb-itb-9161f90
Battery Types for Astronomy
Picking the right battery is essential for keeping your telescope powered and running smoothly.
Comparing Battery Options
Portable power stations today use three main types of batteries. Here’s a breakdown of their key features:
| Feature | Lead-Acid (AGM/Gel) | Lithium-Ion | LiFePO4 |
|---|---|---|---|
| Weight | Heavy, making portability a challenge | Lightweight and easy to carry | Heavier than Lithium-Ion but built tough |
| Cold Weather | Struggles in cold temperatures | Performs decently in moderate cold | Handles cold weather exceptionally well |
| Cycle Life | Shorter lifespan for frequent use | Moderate cycle life | Long-lasting cycle life |
| Maintenance | Needs regular upkeep | Low maintenance | Minimal maintenance |
| Typical Lifespan | Shorter lifespan | Medium lifespan | Long-lasting, offering better value |
| Self-Discharge Rate | Loses charge quickly | Moderate discharge rate | Retains charge for longer periods |
- Lead-Acid (AGM/Gel): These are budget-friendly but lose efficiency in cold weather, making them less ideal for winter use.
- Lithium-Ion: A good balance of portability and performance, maintaining most of its capacity in moderate cold – great for remote locations.
- LiFePO4: Stands out for durability and cold-weather performance, with an extended cycle life. Though heavier, it’s perfect for dedicated astronomers.
Key Factors to Consider
When choosing a battery, keep these in mind:
- Cold Weather: Opt for LiFePO4 or high-quality Lithium-Ion for reliable performance in low temperatures.
- Usage Frequency: If you’ll use it often, the longer cycle life of LiFePO4 can justify the higher cost.
- Portability: If you’ll be traveling to remote sites, weight matters – Lithium-Ion is a lighter option.
- Lifespan and Maintenance: Think about long-term value, including how much upkeep the battery will need.
Tips for Maximizing Battery Life
To get the most out of your power station, store it in moderate temperatures and fully charge it before use. This ensures optimal performance during your stargazing sessions.
For more tips on telescope setups and astrophotography tools, check out Sat ND Telescope and Astrophotography.
Recommended Power Stations
Once you’ve calculated your power needs, it’s time to choose a power station that fits both your capacity and feature requirements.
Entry-Level Power Stations
These models are great for basic setups and provide reliable power:
| Model | Capacity | Runtime* | Weight | Price |
|---|---|---|---|---|
| Jackery Explorer 300 | 293Wh | ~6 hrs | 7.1 lbs | $299.99 |
| Bluetti EB3A | 268Wh | ~5 hrs | 10.1 lbs | $249.99 |
| EcoFlow River 2 | 256Wh | ~5 hrs | 7.7 lbs | $239.00 |
- Includes multiple output options (AC, DC, USB)
- Basic LCD screens for monitoring
- Adequate for most portable telescope setups
- Lightweight and easy to carry
If your setup requires more capacity or advanced features, you’ll want to explore higher-end options.
High-End Power Stations
These models are built for extended use and more demanding setups:
| Model | Capacity | Runtime* | Weight | Price |
|---|---|---|---|---|
| EcoFlow Delta Pro | 3600Wh | ~72 hrs | 84.0 lbs | $3,699.99 |
| Bluetti AC200MAX | 2048Wh | ~41 hrs | 61.9 lbs | $1,899.00 |
| Goal Zero Yeti 1500X | 1516Wh | ~30 hrs | 45.7 lbs | $1,999.95 |
*Runtime estimates are based on a 50W telescope setup with a mount and camera.
- Advanced Battery Management Systems (BMS) for efficiency and safety
- LiFePO4 batteries for durability
- High-output AC ports for multiple devices
- Expandable capacity for future needs
- Smart app integration for monitoring and control
- Built-in heaters for cold-weather performance
Power Station Specs Chart
Here’s a quick comparison of features across different price ranges:
| Feature | Entry-Level | Mid-Range | Professional |
|---|---|---|---|
| Typical Capacity | 200-300Wh | 500-1000Wh | 1500-3600Wh |
| AC Outlets | 1-2 | 2-4 | 4-6 |
| DC Outputs | 1-2 | 2-3 | 3-4 |
| USB Ports | 2-3 | 4-6 | 6-8 |
| Cold Weather Operation | Limited | Moderate | Advanced |
| Display Type | Basic LCD | Smart Display | Smart Display + App |
| Warranty | 2 years | 3-4 years | 5+ years |
| Price Range | $200-$400 | $500-$1,000 | $1,500-$4,000 |
Looking for in-depth reviews or compatibility details for specific telescope models? Check out Sat ND Telescope and Astrophotography. Their Advanced Explorer membership offers detailed power station testing reports and performance insights tailored to astronomy setups.
Conclusion: Making Your Choice
To wrap things up, here’s how to decide on the right power station for your needs: focus on power demands, compatibility, and portability.
Start by calculating the total wattage of your devices, then pick a station with enough capacity to handle those and leave room for any future additions. Make sure the station matches your equipment’s voltage and has the right ports for your telescopes, mounts, cameras, and other gear.
Think about where you’ll typically use it. If you’re heading out to remote dark-sky locations often, a lightweight option might be the way to go. For backyard stargazing, you could prioritize a unit with more capacity and extra features.
If you’ll be observing in colder conditions, look for a model with LiFePO4 batteries, as they perform well even in low temperatures.
- For short sessions: A 300Wh station is usually enough for portable setups.
- For longer imaging sessions: Consider a professional-grade unit with 2000Wh or more, depending on your needs and budget.
For more tips on setting up your gear, check out Sat ND Telescope and Astrophotography at https://sat-nd.com.